网站首页 文章专栏 lnmp环境编译安装-支持多版本PHP
lnmp环境编译安装-支持多版本PHP
编辑时间:2024-06-12 14:59:35
作者:史亚运
浏览量:0
lnmp环境编译安装教程(支持多版本PHP:php5.6,php7,php8)
安装nginx

安装mysql
安装配置多版本php
安装php7
cd php-7.4.25#./configure --prefix=/usr/local/php7 --with-config-file-path=/usr/local/php7/etc --enable-fpm --with-fpm-user=www --with-fpm-group=www --enable-inline-optimization --disable-debug --disable-rpath --enable-shared --enable-soap --with-xmlrpc --with-openssl --with-mcrypt --with-pcre-regex --with-sqlite3 --with-zlib --enable-bcmath --with-iconv --with-bz2 --enable-calendar --with-curl --with-cdb --enable-dom --enable-exif --enable-fileinfo --enable-filter --with-pcre-dir --enable-ftp --with-gd --with-openssl-dir --with-jpeg-dir --with-png-dir --with-freetype-dir --enable-gd-native-ttf --enable-gd-jis-conv --with-gettext --with-gmp --with-mhash --enable-json --enable-mbstring --enable-mbregex --enable-mbregex-backtrack --with-libmbfl --with-onig --enable-pdo --with-mysqli=mysqlnd --with-pdo-mysql=mysqlnd --with-zlib-dir --with-pdo-sqlite --with-readline --enable-session --enable-shmop --enable-simplexml --enable-sockets --enable-sysvmsg --enable-sysvsem --enable-sysvshm --enable-wddx --with-libxml-dir --with-xsl --enable-zip --enable-mysqlnd-compression-support --with-pear --enable-opcache./configure --prefix=/usr/local/php7 --with-config-file-path=/usr/local/php7/etc --with-freetype --enable-gd --with-jpeg --with-gettext --with-gmp --with-mysqli --with-openssl --with-pdo-mysql --with-pear --with-xmlrpc --with-xsl --with-mhash --enable-fpm --with-fpm-user=www --with-fpm-group=www --enable-bcmath --enable-mbstring --enable-sockets --enable-xml --enable-embed --enable-phpdbg --with-ldap --with-snmp --with-bz2 --enable-calendar --with-curl --enable-exif --enable-ftp --enable-pcntl --with-zlib --with-readline --enable-shmopmake && make install
如果./configure报错No package 'oniguruma' found 执行下面操作安装oniguruma
wget wget https://github.com/kkos/oniguruma/archive/refs/tags/v6.9.7.1.tar.gz -O oniguruma-6.9.7.1.tar.gztar -zxvf oniguruma-6.9.7.1.tar.gzcd oniguruma-6.9.7.1/ ./autogen.sh ./configure --prefix=/usr --libdir=/lib64 #64位的系统一定要标识 --libdir=/lib64make && make install
如果出现 make: *** [sapi/cli/php] Error 1 的错误,通过继续执行 make ZEND_EXTRA_LIBS='-liconv' 命令解决 如果还报错/usr/bin/ld: cannot find -liconv 执行下面操作
wget https://ftp.gnu.org/pub/gnu/libiconv/libiconv-1.16.tar.gz --no-check-certificate tar -zxvf libiconv-1.16.tar.gz cd libiconv-1.16/ ./configure --prefix=/usr/local make make install cd /usr/local/lib ln -s /usr/local/lib/libiconv.so /usr/lib ln -s /usr/local/lib/libiconv.so.2 /usr/lib/libiconv.so.2
如果报Cannot find ldap libraries in /usr/lib 执行下面操作
cp -frp /usr/lib64/libldap* /usr/lib/
如果报错/usr/bin/ld: ext/ldap/.libs/ldap.o: undefined reference to symbol 'ber_memfree',按如下操作 ./configure后 vi Makefile 找到 开头是 'EXTRA_LIBS' 这一行 在结尾加上 '-llber' 然后执行 make && make install

wget https://curl.se/download/curl-7.79.1.tar.gz --no-check-certificate tar -zxvf curl-7.79.1.tar.gz cd curl-7.79.1/ ./configure --with-openssl make make install curl --version
如果报make: *** [sapi/cli/php] 错误 vi Makefile EXTRA_LIBS = ..... -lcrypt 在最后加上 -liconv,例如: EXTRA_LIBS = ..... -lcrypt -liconv 然后重新再次 make
如果报 /ext/curl/interface.c undefined reference to `curl_mime_addpart' 执行yum remove curl-devel卸载curl-devel make clean 重新编译安装PHP
cd /usr/local/php7/etccp php-fpm.conf.default php-fpm.confcd /usr/local/php7/etc/php-fpm.dcp www.conf.default www.confcp php-7.4.25/php.ini-development /usr/local/php7/etc/php.ini
ln -s /usr/local/php7/bin/php /usr/bin/php7
配置nginx支持php7
整合nginx和php,让nginx调用php-fpm解析php脚本: 打开/usr/local/nginx/conf/nginx.conf配置文件
location ~ \.php$ {
root html;
fastcgi_pass 127.0.0.1:9000;
fastcgi_index index.php;
fastcgi_param SCRIPT_FILENAME $document_root$fastcgi_script_name;
include fastcgi_params;
index index.php index.htm;
}
安装PHP5.6
wget https://www.php.net/distributions/php-5.6.40.tar.gz
tar -zxvf php-5.6.40.tar.gzcd php-5.6.40 ./configure --prefix=/usr/local/php56 --with-config-file-path=/usr/local/php56/etc --with-gettext --with-gmp --with-mysqli --with-openssl --with-pdo-mysql --with-pear --with-xmlrpc --with-xsl --with-mhash --enable-fpm --with-fpm-user=www --with-fpm-group=www --enable-bcmath --enable-mbstring --enable-sockets --enable-xml --enable-embed --enable-phpdbg --with-ldap --with-snmp --with-bz2 --enable-calendar --with-curl --enable-exif --enable-ftp --enable-pcntl --with-zlib --with-readline --enable-shmopmake && make install
cd /usr/local/php56/etccp php-fpm.conf.default php-fpm.confcp php-5.6.40/php.ini-development /usr/local/php56/etc/php.ini
ln -s /usr/local/php56/bin/php /usr/bin/php56

cd /usr/local/php56/sbin ./php-fpm
配置nginx支持php5.6
整合nginx和php,让nginx调用php-fpm解析php脚本:
cd /usr/local/nginx/confmkdir vhostcd vhosttouch local.php56.confvi local.php56.conf#添加新的server配置server {
listen 80;
#listen [::]:80;
server_name local.php56.com;
index index.html index.htm index.php default.html default.htm default.php;
root /home/wwwroot/local.php56.com;
#error_page 404 /404.html;
# Deny access to PHP files in specific directory
#location ~ /(wp-content|uploads|wp-includes|images)/.*\.php$ { deny all; }
location ~ .*\.(gif|jpg|jpeg|png|bmp|swf)$ {
expires 30d;
}
location ~ .*\.(js|css)?$ {
expires 12h;
}
location ~ /.well-known {
allow all;
}
location ~ /\. {
deny all;
}
location ~ \.php$ {
root html;
fastcgi_pass 127.0.0.1:9001; # 这里是重点
fastcgi_index index.php;
fastcgi_param SCRIPT_FILENAME $document_root$fastcgi_script_name;
include fastcgi_params;
index index.php index.htm;
}
access_log /home/wwwrootlog/local.php56.com.log;
}#保存退出vi /usr/local/nginx/conf/nginx.conf#在最后加上include vhost/*.conf;
日志文件和项目目录没有的自行创建但写入权限不要忘记 然后重启nginx

安装PHP8
wget https://www.php.net/distributions/php-8.0.12.tar.gz
tar -zxvf php-8.0.12.tar.gzcd php-8.0.12 ./configure --prefix=/usr/local/php8 --with-config-file-path=/usr/local/php8/etc --with-freetype --enable-gd --with-jpeg --with-gettext --with-gmp --with-mysqli --with-openssl --with-pdo-mysql --with-pear --with-xsl --with-mhash --enable-fpm --with-fpm-user=www --with-fpm-group=www --enable-bcmath --enable-mbstring --enable-sockets --enable-xml --enable-embed --enable-phpdbg --with-ldap --with-snmp --with-bz2 --enable-calendar --with-curl --enable-exif --enable-ftp --enable-pcntl --with-zlib --with-readline --enable-shmopmake && make install
[root@gitlab php-8.0.11]# yum search libcurl已加载插件:fastestmirror Loading mirror speeds from cached hostfile * base: mirrors.cn99.com * extras: mirrors.cn99.com * updates: mirrors.cn99.com======================================================== N/S matched: libcurl =========================================================libcurl-devel.i686 : Files needed for building applications with libcurl libcurl-devel.x86_64 : Files needed for building applications with libcurl libcurl.i686 : A library for getting files from web servers libcurl.x86_64 : A library for getting files from web servers perl-WWW-Curl.x86_64 : Perl extension interface for libcurl python-pycurl.x86_64 : A Python interface to libcurl 名称和简介匹配 only,使用“search all”试试。[root@gitlab php-8.0.11]# yum install -y libcurl-devel.x86_64
wget https://ftp.gnu.org/pub/gnu/libiconv/libiconv-1.16.tar.gz --no-check-certificatetar -zxvf libiconv-1.16.tar.gzcd libiconv-1.16 ./configure --prefix=/usr/local/libiconvmake && make install
./configure --prefix=/usr/local/php8 --with-config-file-path=/usr/local/php8/etc --with-freetype --enable-gd --with-jpeg --with-gettext --with-gmp --with-mysqli --with-openssl --with-pdo-mysql --with-pear --with-xsl --with-mhash --enable-fpm --with-fpm-user=www --with-fpm-group=www --enable-bcmath --enable-mbstring --enable-sockets --enable-xml --enable-embed --enable-phpdbg --with-ldap --with-snmp --with-bz2 --enable-calendar --with-curl --enable-exif --enable-ftp --enable-pcntl --with-zlib --with-readline --enable-shmop --with-iconv=/usr/local/libiconvmake && make install
cd /usr/local/php8/etccp php-fpm.conf.default php-fpm.confcd /usr/local/php8/etc/php-fpm.dcp www.conf.default www.confcp php-8.0.12/php.ini-development /usr/local/php8/etc/php.ini
ln -s /usr/local/php8/bin/php /usr/bin/php8

cd /usr/local/php8/sbin ./php-fpm
配置nginx支持php8
整合nginx和php,让nginx调用php-fpm解析php脚本:
cd /usr/local/nginx/confcd vhosttouch local.php8.confvi local.php8.conf#添加新的server配置server {
listen 80;
#listen [::]:80;
server_name local.php8.com;
index index.html index.htm index.php default.html default.htm default.php;
root /home/wwwroot/local.php8.com;
#error_page 404 /404.html;
# Deny access to PHP files in specific directory
#location ~ /(wp-content|uploads|wp-includes|images)/.*\.php$ { deny all; }
location ~ .*\.(gif|jpg|jpeg|png|bmp|swf)$ {
expires 30d;
}
location ~ .*\.(js|css)?$ {
expires 12h;
}
location ~ /.well-known {
allow all;
}
location ~ /\. {
deny all;
}
location ~ \.php$ {
root html;
fastcgi_pass 127.0.0.1:9002; # 这里是重点
fastcgi_index index.php;
fastcgi_param SCRIPT_FILENAME $document_root$fastcgi_script_name;
include fastcgi_params;
index index.php index.htm;
}
access_log /home/wwwrootlog/local.php8.com.log;
}
#保存退出
配置nginx和php-fpm用sock套接字连接
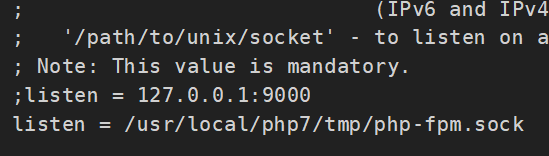
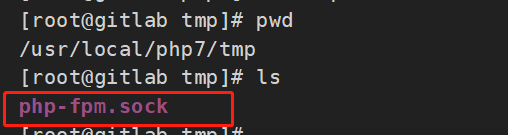
php5.3之后的版本,php-fpm.conf(php5)/www.conf(php7或更高版本)里的listen的默认配置是127.0.0.1:9000且不会默认生成php-fpm.sock, 所以如果需要nginx里的配置有php-fpm.sock的话,需要将listen的地址配置成和nginx的配置文件一致, 同时保证这个路径已经存在,这样在启动./php-fpm的时候就会在对应路径上自动生成php-fpm.sock
cd /usr/local/php7/etc/php-fpm.d/vi www.conf#添加 listen = /usr/local/php7/tmp/php-fpm.sock
cd /usr/local/nginx/conf/vhost/vi local.php7.conf#添加 fastcig_pass unix:/usr/local/php7/tmp/php-fpm.sock;

重启php-fpm和nginx


vi nginx.conf

cd /usr/local/nginx/sbin/ ./nginx -s reload

最新评论
-
lxbfYeaa 2026-04-12 06:44:47555
-
lxbfYeaa 2026-04-12 06:44:50555
-
lxbfYeaa 2026-04-12 06:44:55555
-
lxbfYeaa 2026-04-12 06:44:56-1 OR 5*5=25 --
-
lxbfYeaa 2026-04-12 06:44:56-1 OR 5*5=25
-
lxbfYeaa 2026-04-12 06:44:56-1' OR 5*5=25 --
-
lxbfYeaa 2026-04-12 06:44:56-1" OR 5*5=25 --
-
lxbfYeaa 2026-04-12 06:44:57-1' OR 5*5=25 or '0zpujJjf'='
-
lxbfYeaa 2026-04-12 06:44:57-1" OR 5*5=25 or "E0ilv1Ef"="
-
lxbfYeaa 2026-04-12 06:45:02555*if(now()=sysdate(),sleep(15),0)
-
lxbfYeaa 2026-04-12 06:45:085550'XOR(555*if(now()=sysdate(),sleep(15),0))XOR'Z
-
lxbfYeaa 2026-04-12 06:45:125550"XOR(555*if(now()=sysdate(),sleep(15),0))XOR"Z
-
lxbfYeaa 2026-04-12 06:45:18(select(0)from(select(sleep(15)))v)/*'+(select(0)from(select(sleep(15)))v)+'"+(select(0)from(select(sleep(15)))v)+"*/
-
lxbfYeaa 2026-04-12 06:45:24
-
lxbfYeaa 2026-04-12 06:45:29
-
lxbfYeaa 2026-04-12 06:45:35555-1 waitfor delay '0:0:15' --
-
lxbfYeaa 2026-04-12 06:45:40
-
lxbfYeaa 2026-04-12 06:46:06555-1 OR 622=(SELECT 622 FROM PG_SLEEP(15))--
-
lxbfYeaa 2026-04-12 06:46:12555-1) OR 71=(SELECT 71 FROM PG_SLEEP(15))--
-
lxbfYeaa 2026-04-12 06:46:17555-1)) OR 336=(SELECT 336 FROM PG_SLEEP(15))--
-
lxbfYeaa 2026-04-12 06:46:23555YXZOQneV' OR 537=(SELECT 537 FROM PG_SLEEP(15))--
-
lxbfYeaa 2026-04-12 06:46:29555Q2Wbq1PR') OR 928=(SELECT 928 FROM PG_SLEEP(15))--
-
lxbfYeaa 2026-04-12 06:46:32555hEh5bsXS')) OR 495=(SELECT 495 FROM PG_SLEEP(15))--
-
lxbfYeaa 2026-04-12 06:46:35555*DBMS_PIPE.RECEIVE_MESSAGE(CHR(99)||CHR(99)||CHR(99),15)
-
lxbfYeaa 2026-04-12 06:46:38555'||DBMS_PIPE.RECEIVE_MESSAGE(CHR(98)||CHR(98)||CHR(98),15)||'
-
lxbfYeaa 2026-04-12 06:46:39555
-
lxbfYeaa 2026-04-12 06:46:39555'"
-
lxbfYeaa 2026-04-12 06:46:40@@3wV6O
-
lxbfYeaa 2026-04-12 06:46:40(select 198766*667891)
-
lxbfYeaa 2026-04-12 06:46:40(select 198766*667891 from DUAL)
-
lxbfYeaa 2026-04-12 06:46:42555
-
lxbfYeaa 2026-04-12 06:46:44555
-
-1 OR 5*5=25 -- 2026-04-12 06:46:44555
-
-1 OR 5*5=25 2026-04-12 06:46:45555
-
-1' OR 5*5=25 -- 2026-04-12 06:46:45555
-
-1" OR 5*5=25 -- 2026-04-12 06:46:45555
-
-1' OR 5*5=25 or 'uUdQA7QX'=' 2026-04-12 06:46:46555
-
-1" OR 5*5=25 or "ZRPBsBVh"=" 2026-04-12 06:46:46555
-
if(now()=sysdate(),sleep(15),0) 2026-04-12 06:46:47555
-
lxbfYeaa0'XOR(if(now()=sysdate(),sleep(15),0))XOR'Z 2026-04-12 06:46:49555
-
lxbfYeaa0"XOR(if(now()=sysdate(),sleep(15),0))XOR"Z 2026-04-12 06:46:51555
-
(select(0)from(select(sleep(15)))v)/*'+(select(0)from(select(sleep(15)))v)+'"+(select(0)from(select(sleep(15)))v)+"*/ 2026-04-12 06:46:53555
-
lxbfYeaa-1 waitfor delay '0:0:15' -- 2026-04-12 06:46:55555
-
2026-04-12 06:46:57555
-
lxbfYeaaq5CB3amH' OR 835=(SELECT 835 FROM PG_SLEEP(15))-- 2026-04-12 06:46:58555
-
lxbfYeaa0ZhNpNWw') OR 950=(SELECT 950 FROM PG_SLEEP(15))-- 2026-04-12 06:47:00555
-
lxbfYeaazmUPB7GI')) OR 782=(SELECT 782 FROM PG_SLEEP(15))-- 2026-04-12 06:47:02555
-
lxbfYeaa'||DBMS_PIPE.RECEIVE_MESSAGE(CHR(98)||CHR(98)||CHR(98),15)||' 2026-04-12 06:47:03555
-
lxbfYeaa 2026-04-12 06:47:03555
-
lxbfYeaa'" 2026-04-12 06:47:03555
-
@@fzObb 2026-04-12 06:47:04555
-
(select 198766*667891) 2026-04-12 06:47:04555
-
(select 198766*667891 from DUAL) 2026-04-12 06:47:04555
-
lxbfYeaa 2026-04-12 06:47:25555